Before you start
You need:- Access to Facebook Events Manager for your ads account.
- Access to the Tracking page in Eyk.
Part 1: Get your credentials from Meta
1
Open Events Manager
Go to Facebook Events Manager for your ads account.
2
Open your data source settings
In the Data sources list, click the data source you want to connect. Then open the Settings tab.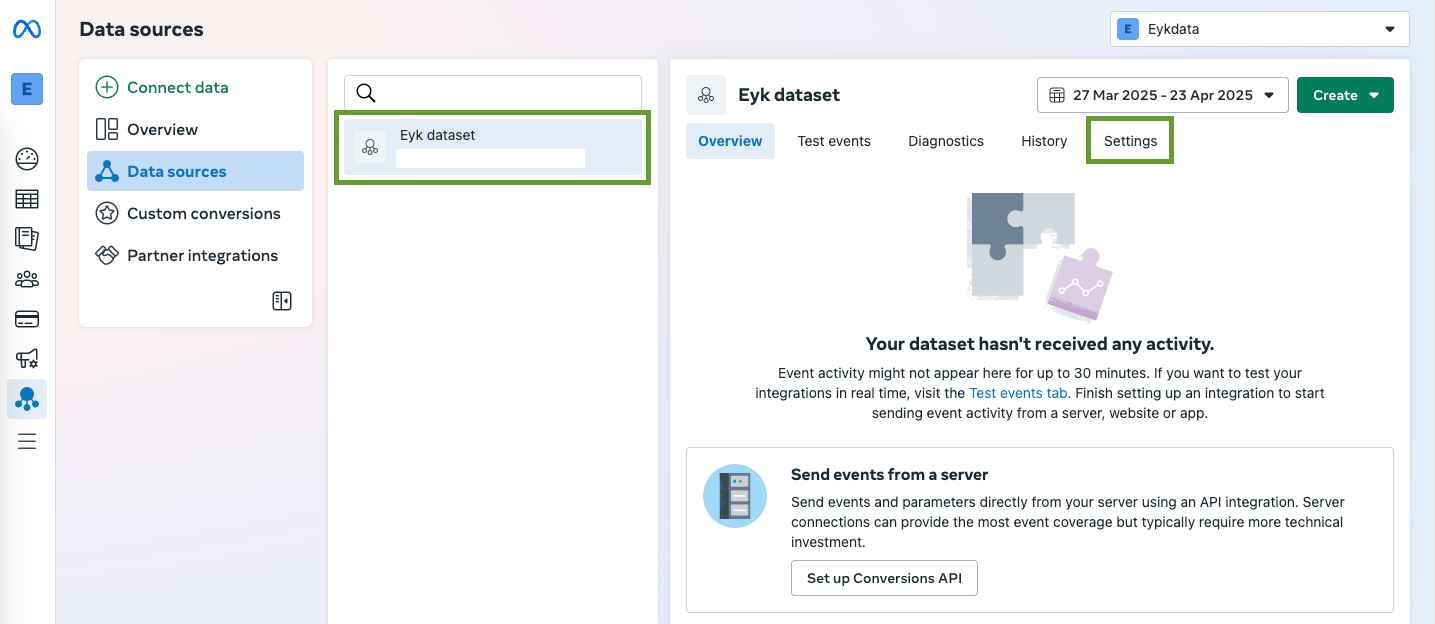
3
Copy the Dataset ID
On the Settings tab, copy the Dataset ID. You need it in Part 2.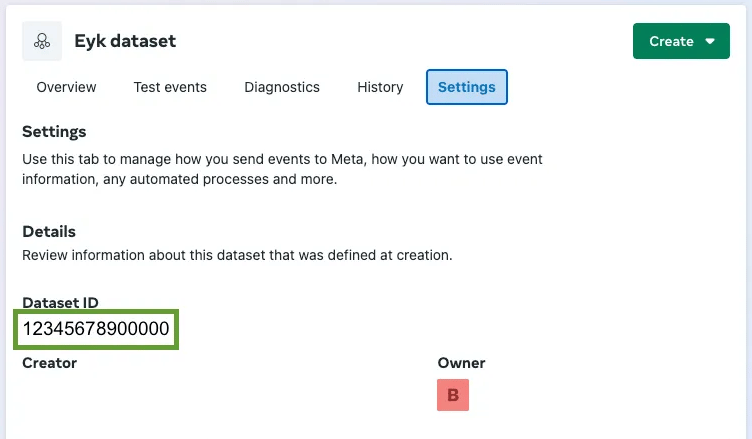
4
Generate an access token
On the Settings tab, scroll down to the Conversion API section and click Generate access token. Copy the access token. You need it in Part 2.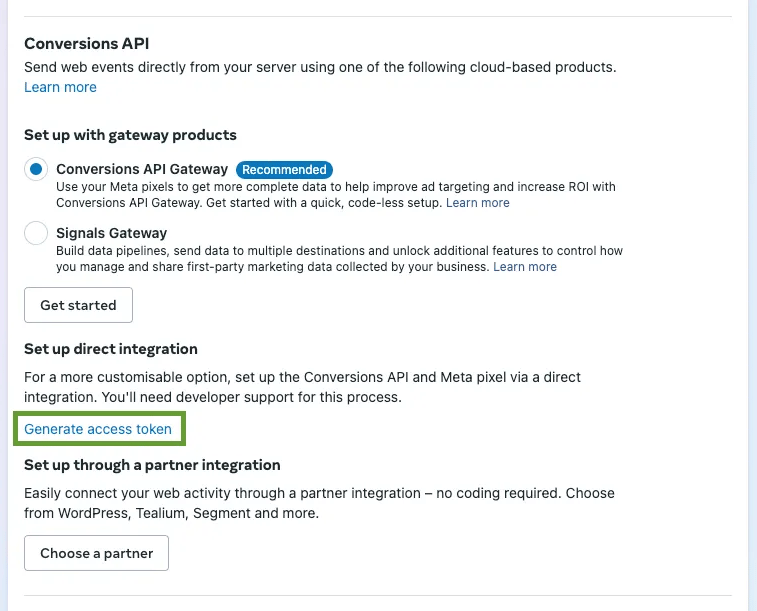
5
Copy the test event code
Go to the Test events tab. Open the section Confirm that your server’s events are set up correctly. Click Copy to copy the test event code. You need it in Part 2.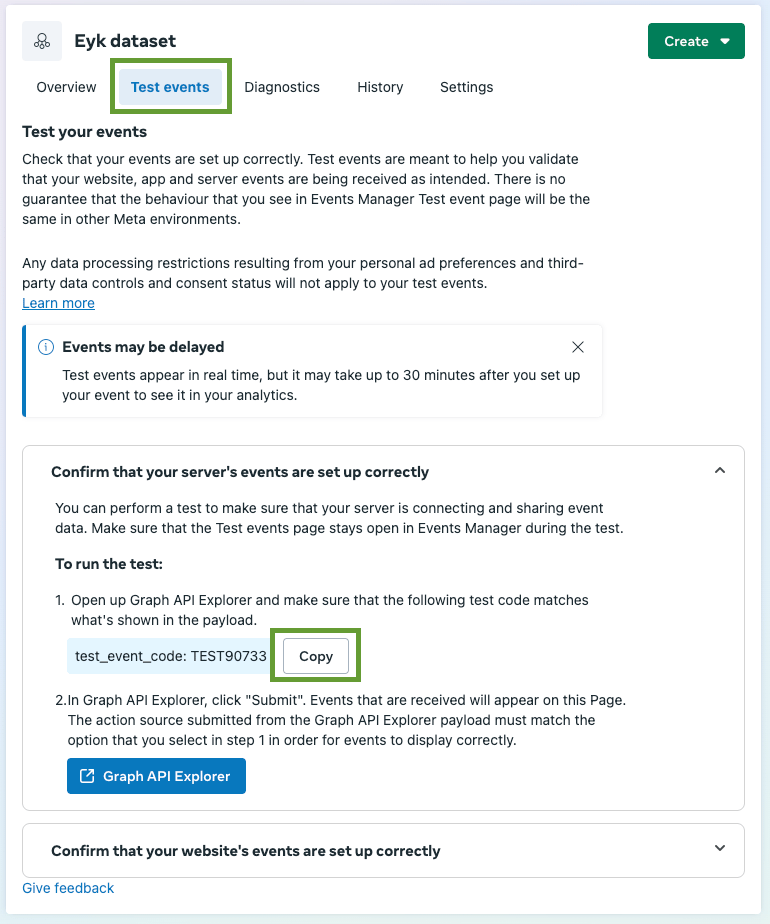
Part 2: Add the destination in Eyk
1
Add a destination
In Eyk, go to Tracking and click + Add destination.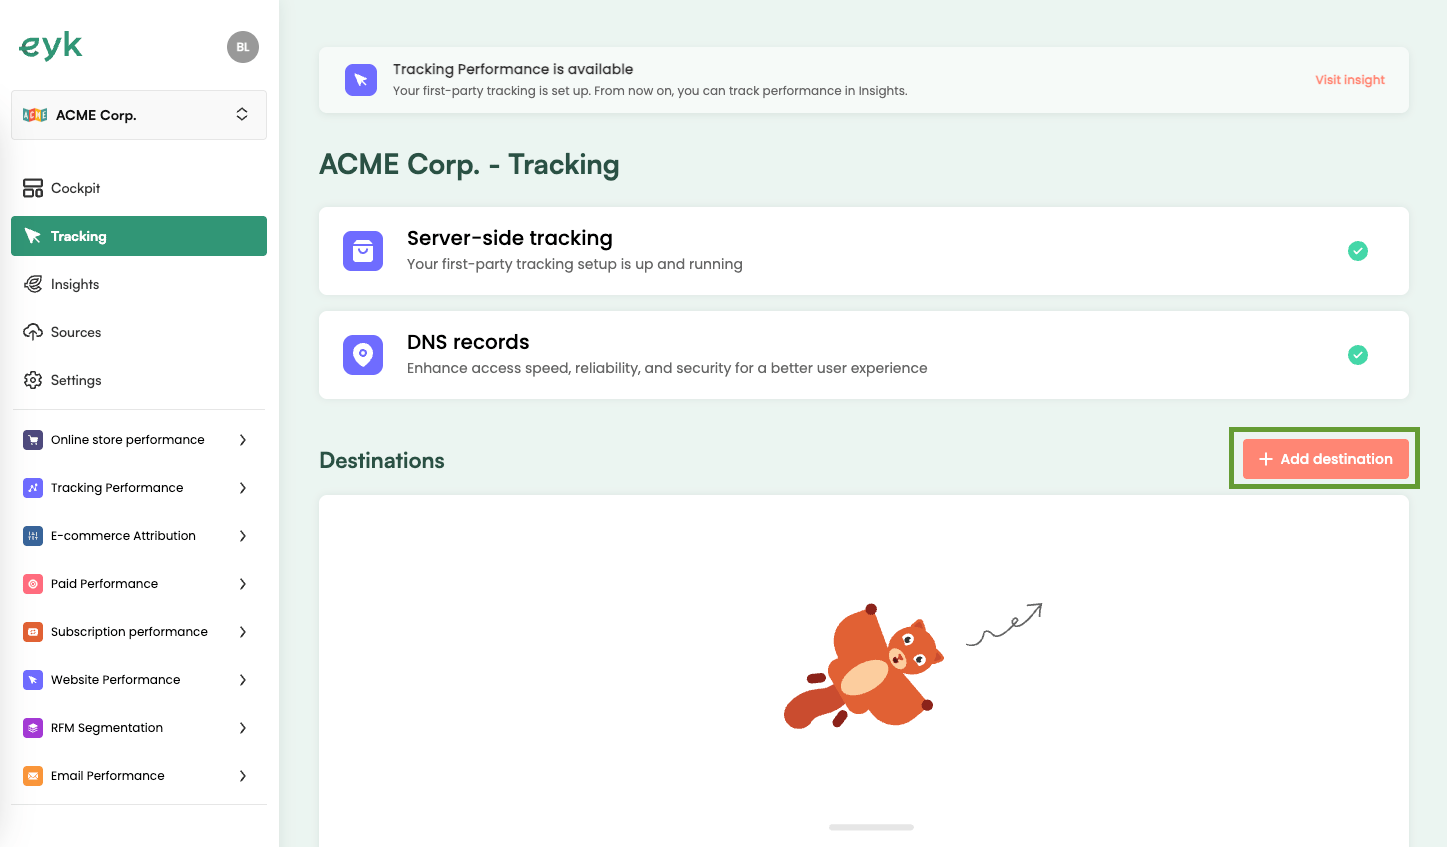
2
Select Meta Ads
Select Meta Ads from the list of destinations.
3
Start verification
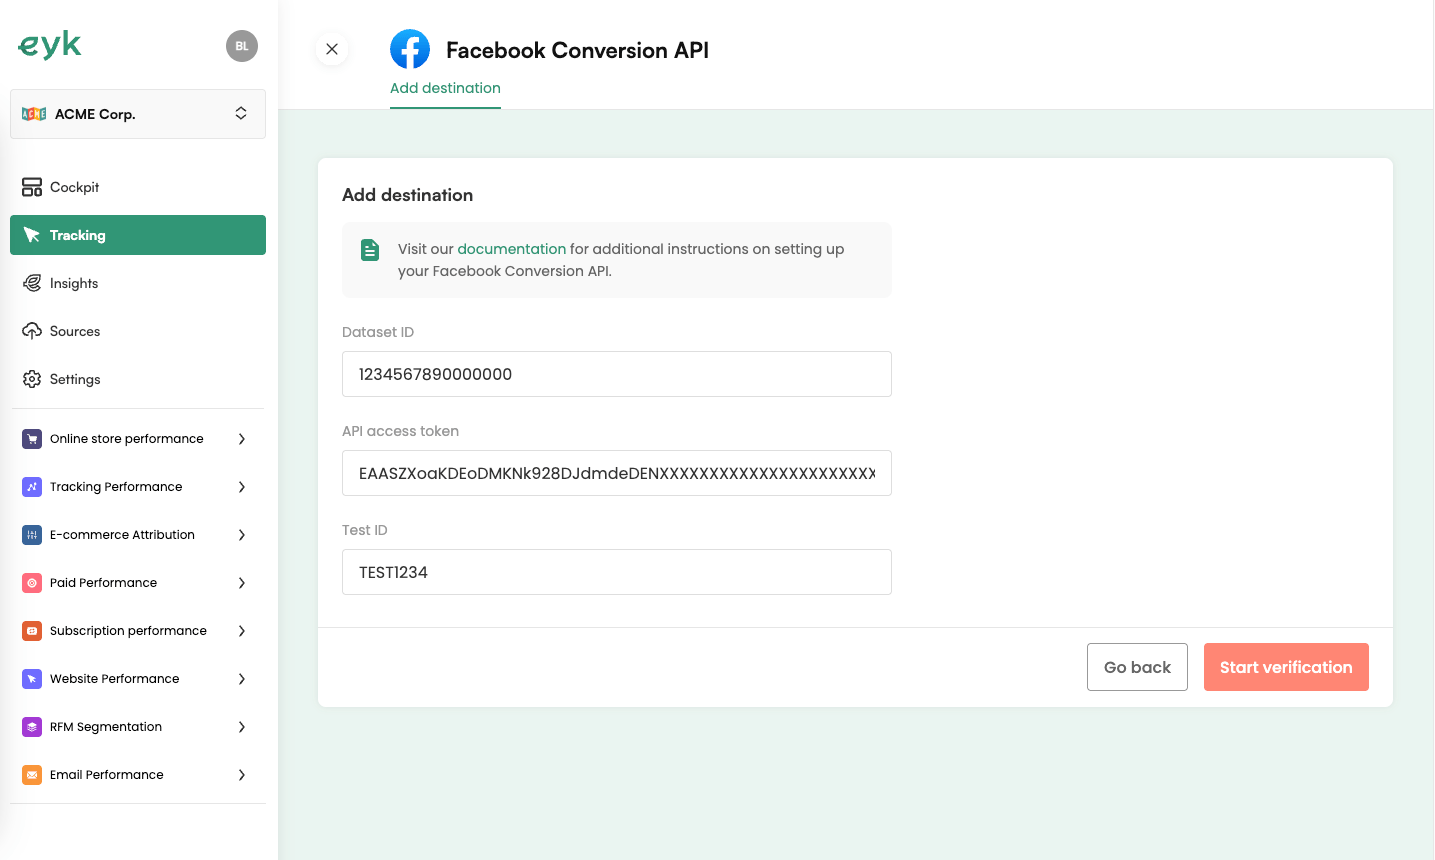
Enter the Dataset ID, API access token and Test ID from Part 1 and click Start verification.