> ## Documentation Index
> Fetch the complete documentation index at: https://docs.eykdata.com/llms.txt
> Use this file to discover all available pages before exploring further.
# TikTok destination
> Conversion tracking
The TikTok Ads destination in Eyk sends both Client-side and Server-side event data to TikTok.
## Setup instructions
Go to [TikTok Business Center](https://business.tiktok.com/manage/assets/pixels) and navigate to **Assets** >> **Pixels**.
Choose **Add a pixel** to create a new pixel, or continue to step 4 below to select an existing pixel.
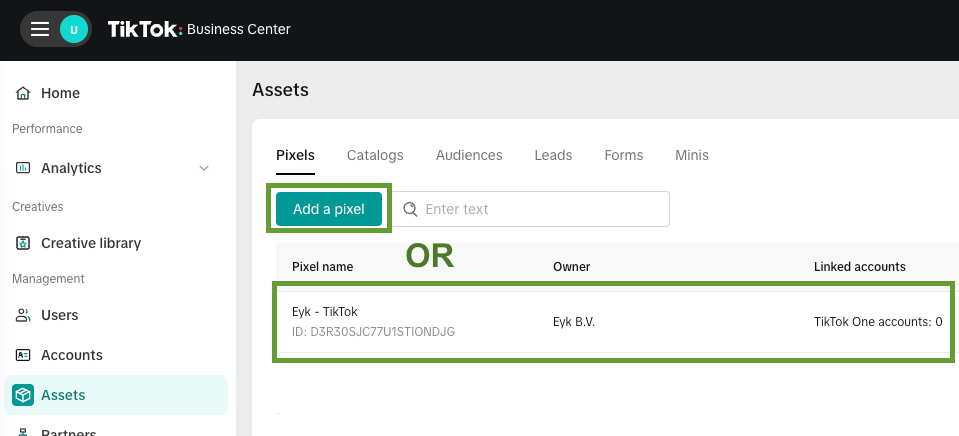 If you selected **Add a pixel**, complete the flow with the following steps:
1. Select **Manual setup**
2. Select **TikTok Pixel + Events API**
3. Create pixel: give your pixel a name, like `Eyk - Pixel`
4. Install base code: click **Next**
5. Manage configurations: select **Enable Automatic Advanced Matching (AAM)** and select **Allow automatic event setup**, leave the other toggles enabled. Then click **Next**
6. Set up events: click **Next**
7. Verify pixel setup: click **Next**
8. Set up business funnel: in the **Choose a template** drop-down, select **E-commerce**. Then click **Next**
9. Implement Events API: click **Generate access token**, and copy the access token for later use in Eyk. Then click **Next**
10. Verify eAPI setup: click **Finish**
11. On the next screen, copy the **Pixel ID** for later use in Eyk
If you selected **Add a pixel**, complete the flow with the following steps:
1. Select **Manual setup**
2. Select **TikTok Pixel + Events API**
3. Create pixel: give your pixel a name, like `Eyk - Pixel`
4. Install base code: click **Next**
5. Manage configurations: select **Enable Automatic Advanced Matching (AAM)** and select **Allow automatic event setup**, leave the other toggles enabled. Then click **Next**
6. Set up events: click **Next**
7. Verify pixel setup: click **Next**
8. Set up business funnel: in the **Choose a template** drop-down, select **E-commerce**. Then click **Next**
9. Implement Events API: click **Generate access token**, and copy the access token for later use in Eyk. Then click **Next**
10. Verify eAPI setup: click **Finish**
11. On the next screen, copy the **Pixel ID** for later use in Eyk
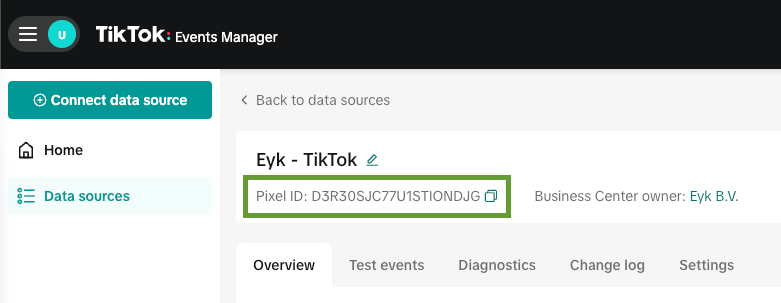
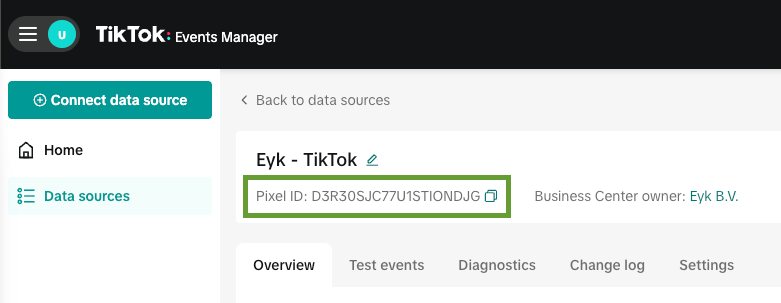 \[SKIP this step if you created a new pixel] To select an existing pixel:
1. Click on the pixel in the list, then click on **Open in Events Manager**
2. Copy the **Pixel ID** for later use in Eyk
\[SKIP this step if you created a new pixel] To select an existing pixel:
1. Click on the pixel in the list, then click on **Open in Events Manager**
2. Copy the **Pixel ID** for later use in Eyk
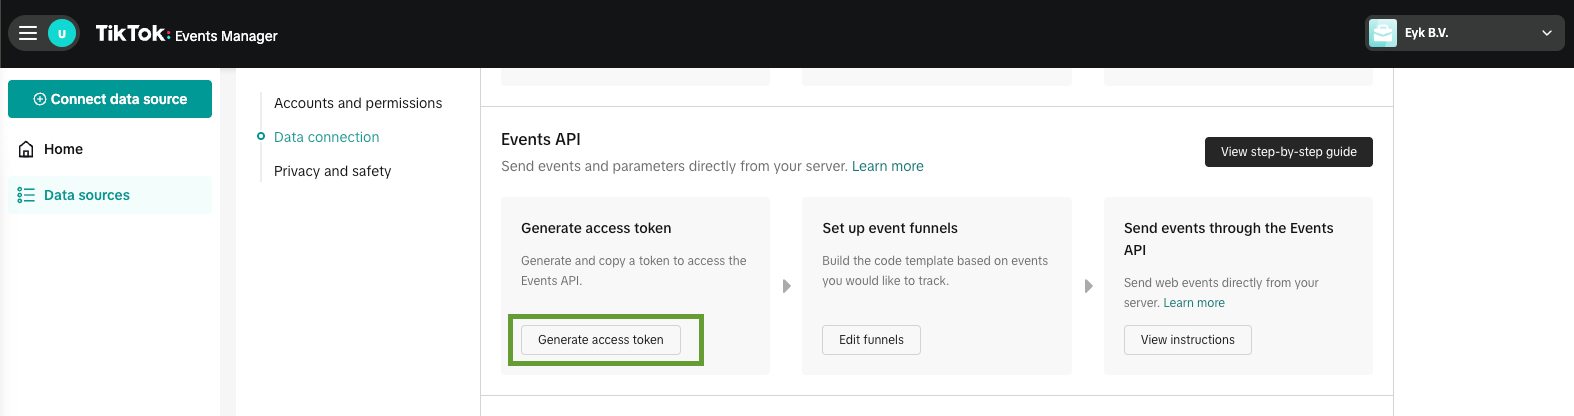
 3. Navigate to the **Settings** tab, then scroll down to **Data connection**
4. Find the **Events API** section and click on **Generate access token**. Copy the access token for later use in Eyk
3. Navigate to the **Settings** tab, then scroll down to **Data connection**
4. Find the **Events API** section and click on **Generate access token**. Copy the access token for later use in Eyk
 5. Scroll down to **Privacy and safety** and ensure **Enable Automatic Advanced Matching (AAM)** and select **Allow automatic event setup** are toggled ON
In your Eyk environment, go to **Tracking** and click the **+ Add destination** button.
5. Scroll down to **Privacy and safety** and ensure **Enable Automatic Advanced Matching (AAM)** and select **Allow automatic event setup** are toggled ON
In your Eyk environment, go to **Tracking** and click the **+ Add destination** button.
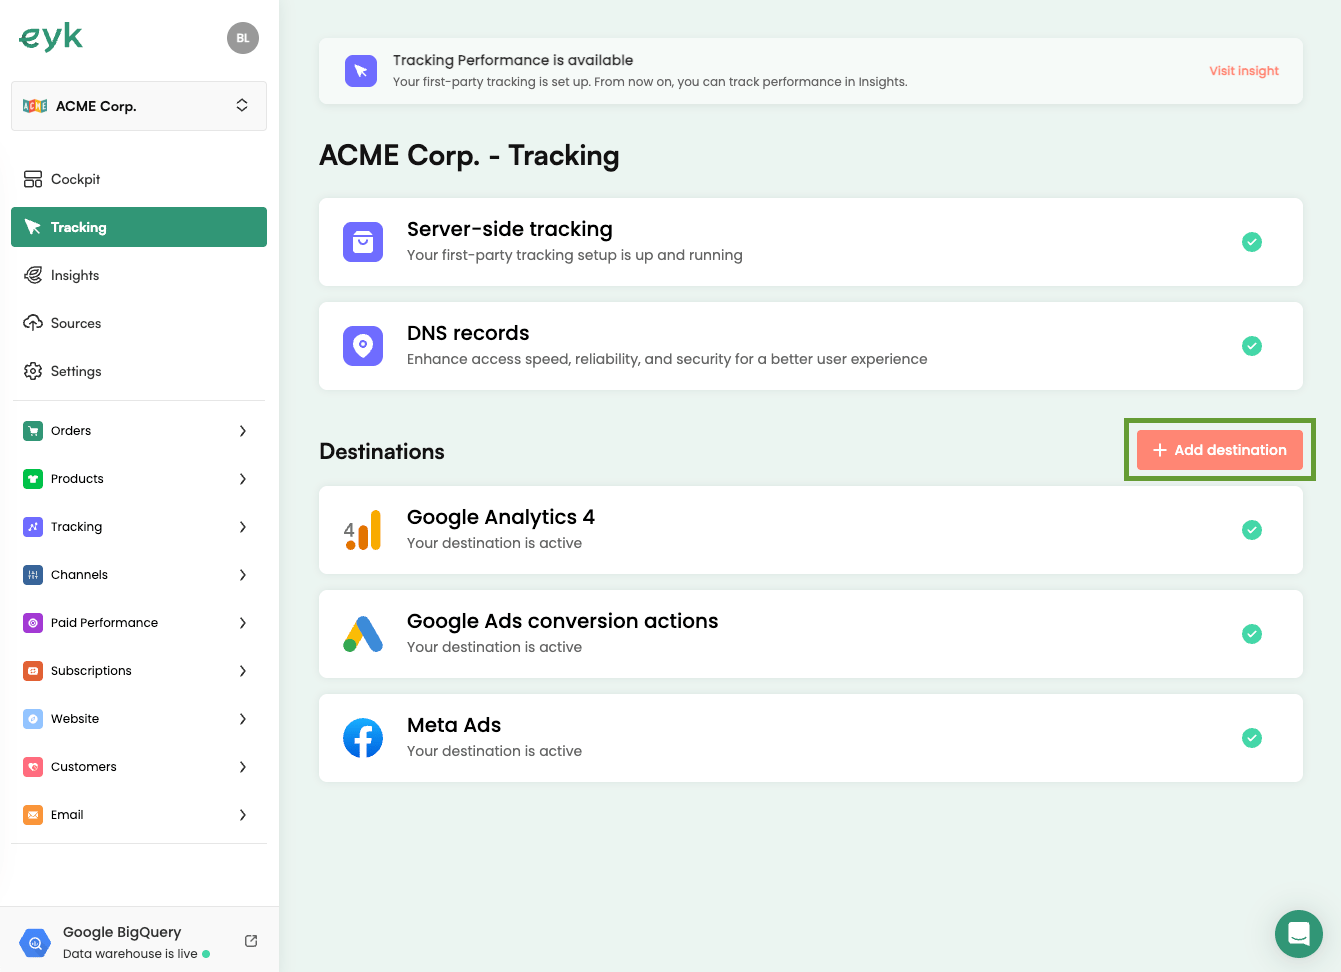 Select **TikTok Ads** from the list of destinations.
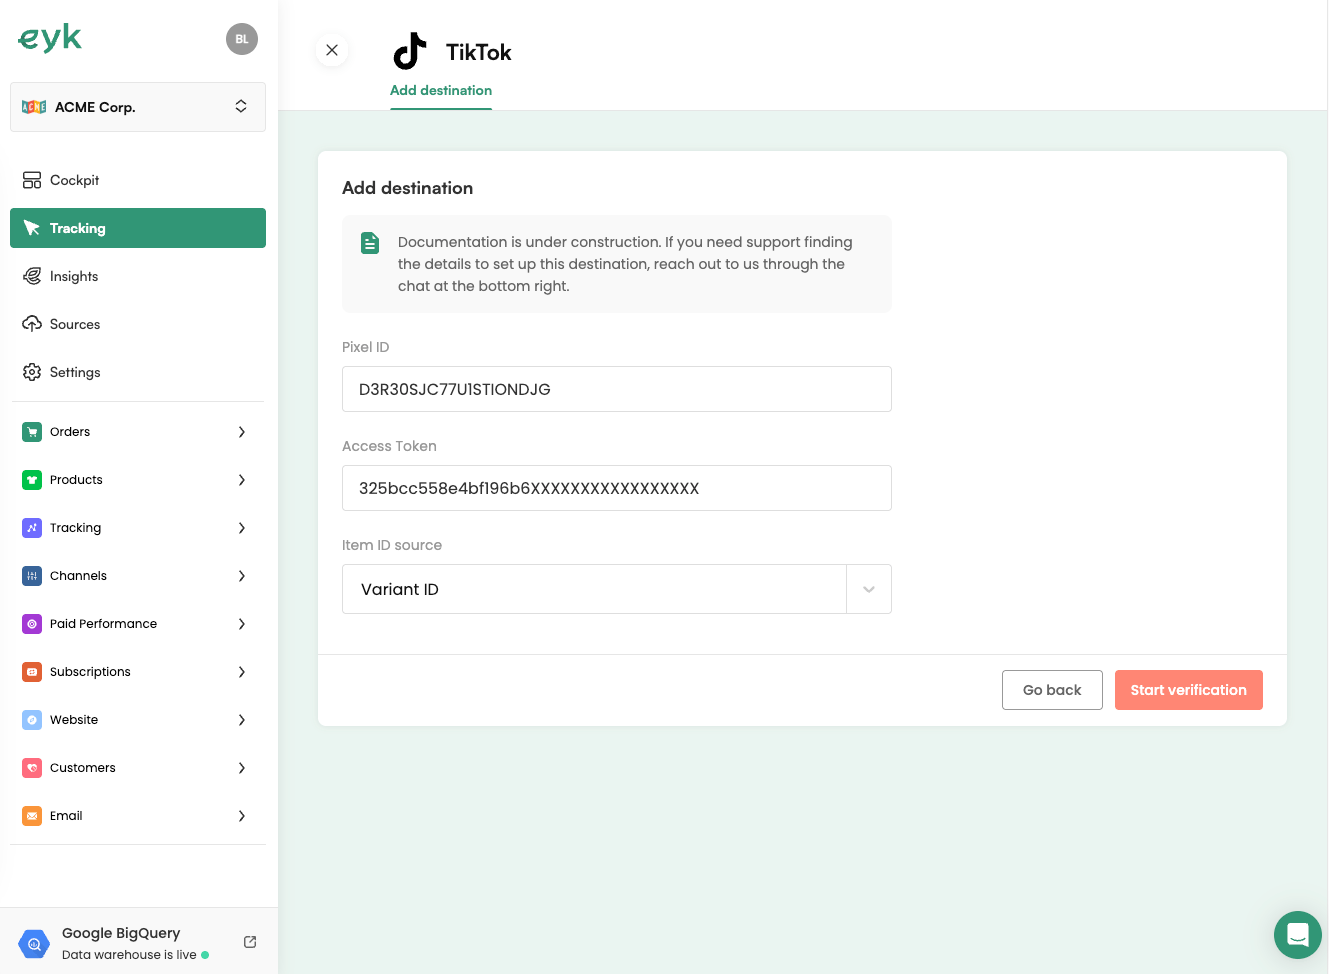
Enter the **Pixel ID** and **Access token** collected in the previous steps.
Select an **Item ID source** to determine what product identified should be reported to TikTok. If you have an active product feed to TikTok, make sure this matches the identifier type used there.
Then click **Start verification**.
Select **TikTok Ads** from the list of destinations.
Enter the **Pixel ID** and **Access token** collected in the previous steps.
Select an **Item ID source** to determine what product identified should be reported to TikTok. If you have an active product feed to TikTok, make sure this matches the identifier type used there.
Then click **Start verification**.
 All done! ✅
Once you publish this destination, you should pause or remove all existing TikTok tracking. Leaving these on will lead to duplicate tracking.
All done! ✅
Once you publish this destination, you should pause or remove all existing TikTok tracking. Leaving these on will lead to duplicate tracking.