> ## Documentation Index
> Fetch the complete documentation index at: https://docs.eykdata.com/llms.txt
> Use this file to discover all available pages before exploring further.
# OpenAI Ads destination
> Conversion tracking
The OpenAI Ads destination is only available on Eyk's new tracking setup, which is currently in beta. Ask your Eyk contact person for access.
The OpenAI Ads destination in Eyk sends both client-side and server-side event data to OpenAI Ads, so you can measure and optimise campaigns that run in ChatGPT.
## Before you start
You need:
* Access to the [OpenAI Ads Manager](https://ads.openai.com/) for your account.
* The beta tracking setup enabled in your Eyk environment.
Setup has two parts. First you create a data source and a conversion key in OpenAI Ads Manager. Then you enter both in Eyk.
## Part 1: Get your credentials from OpenAI
Go to [OpenAI Ads Manager](https://ads.openai.com/) and navigate to **Tools** >> **Conversions**.
Click **+ Create** in the top-right corner and select **Data Source**.
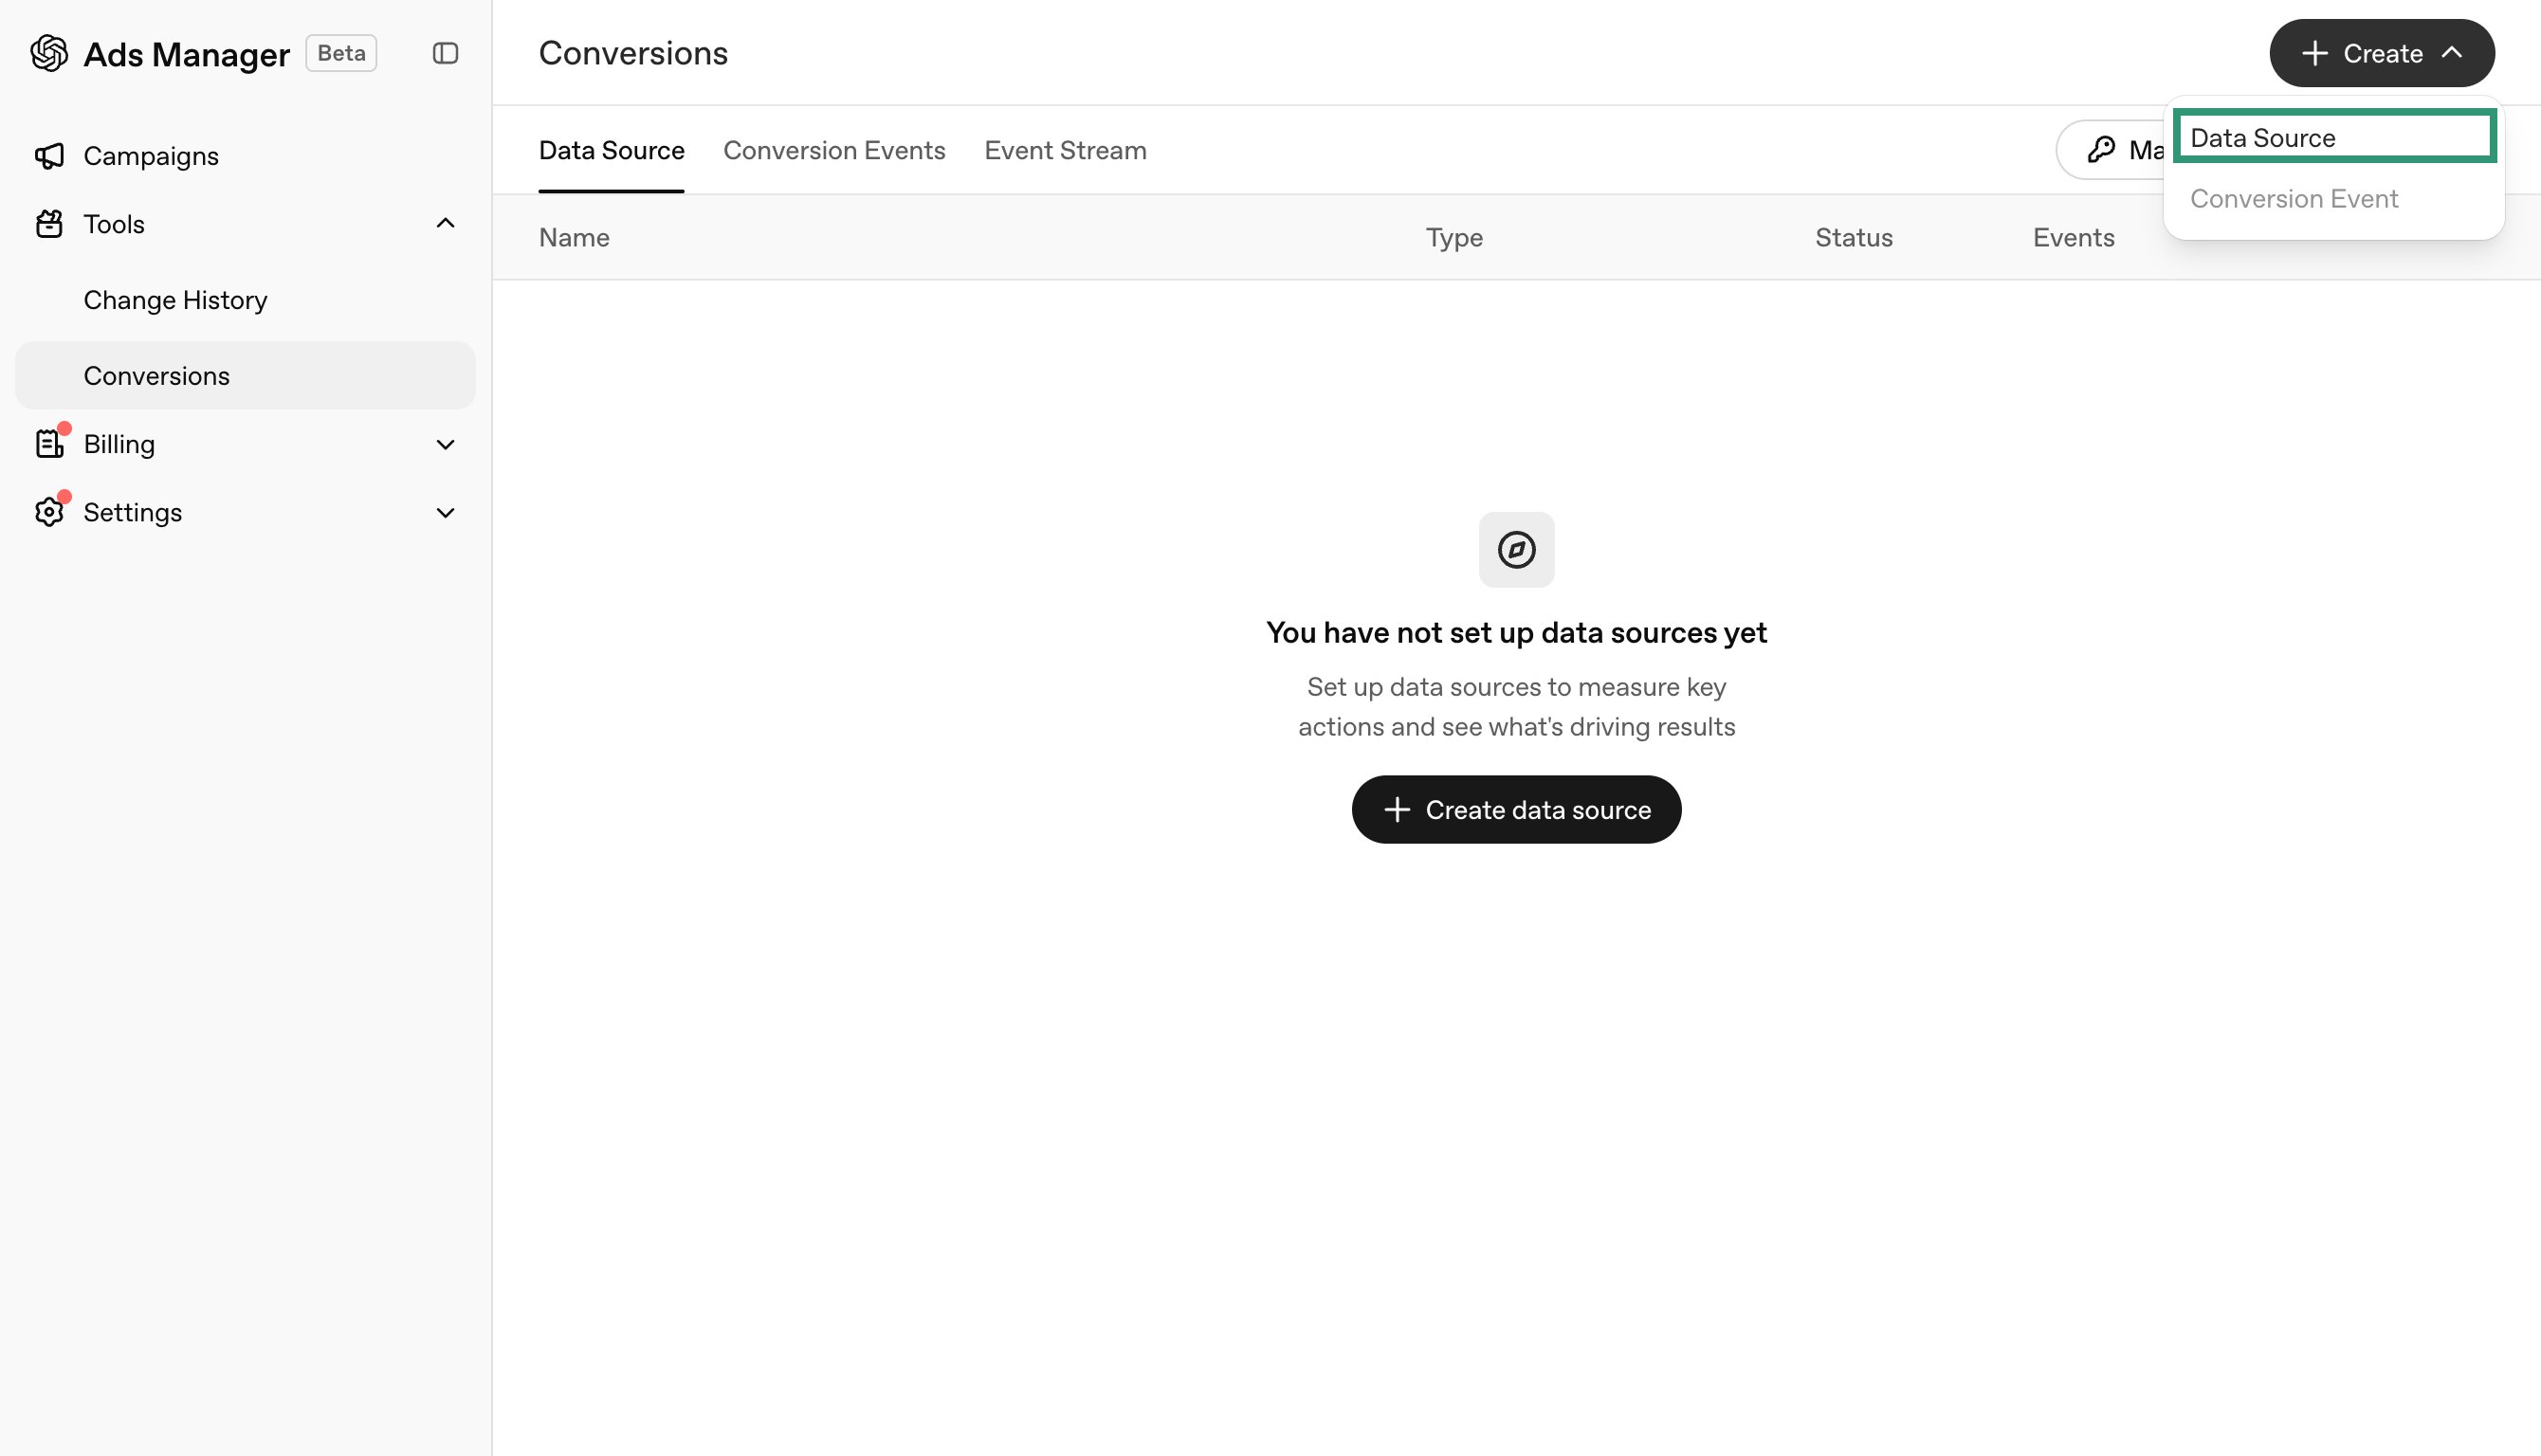 For **Data Source Name** enter `Eyk Pixel`. Keep **Type** set to **Web** and click **Create**.
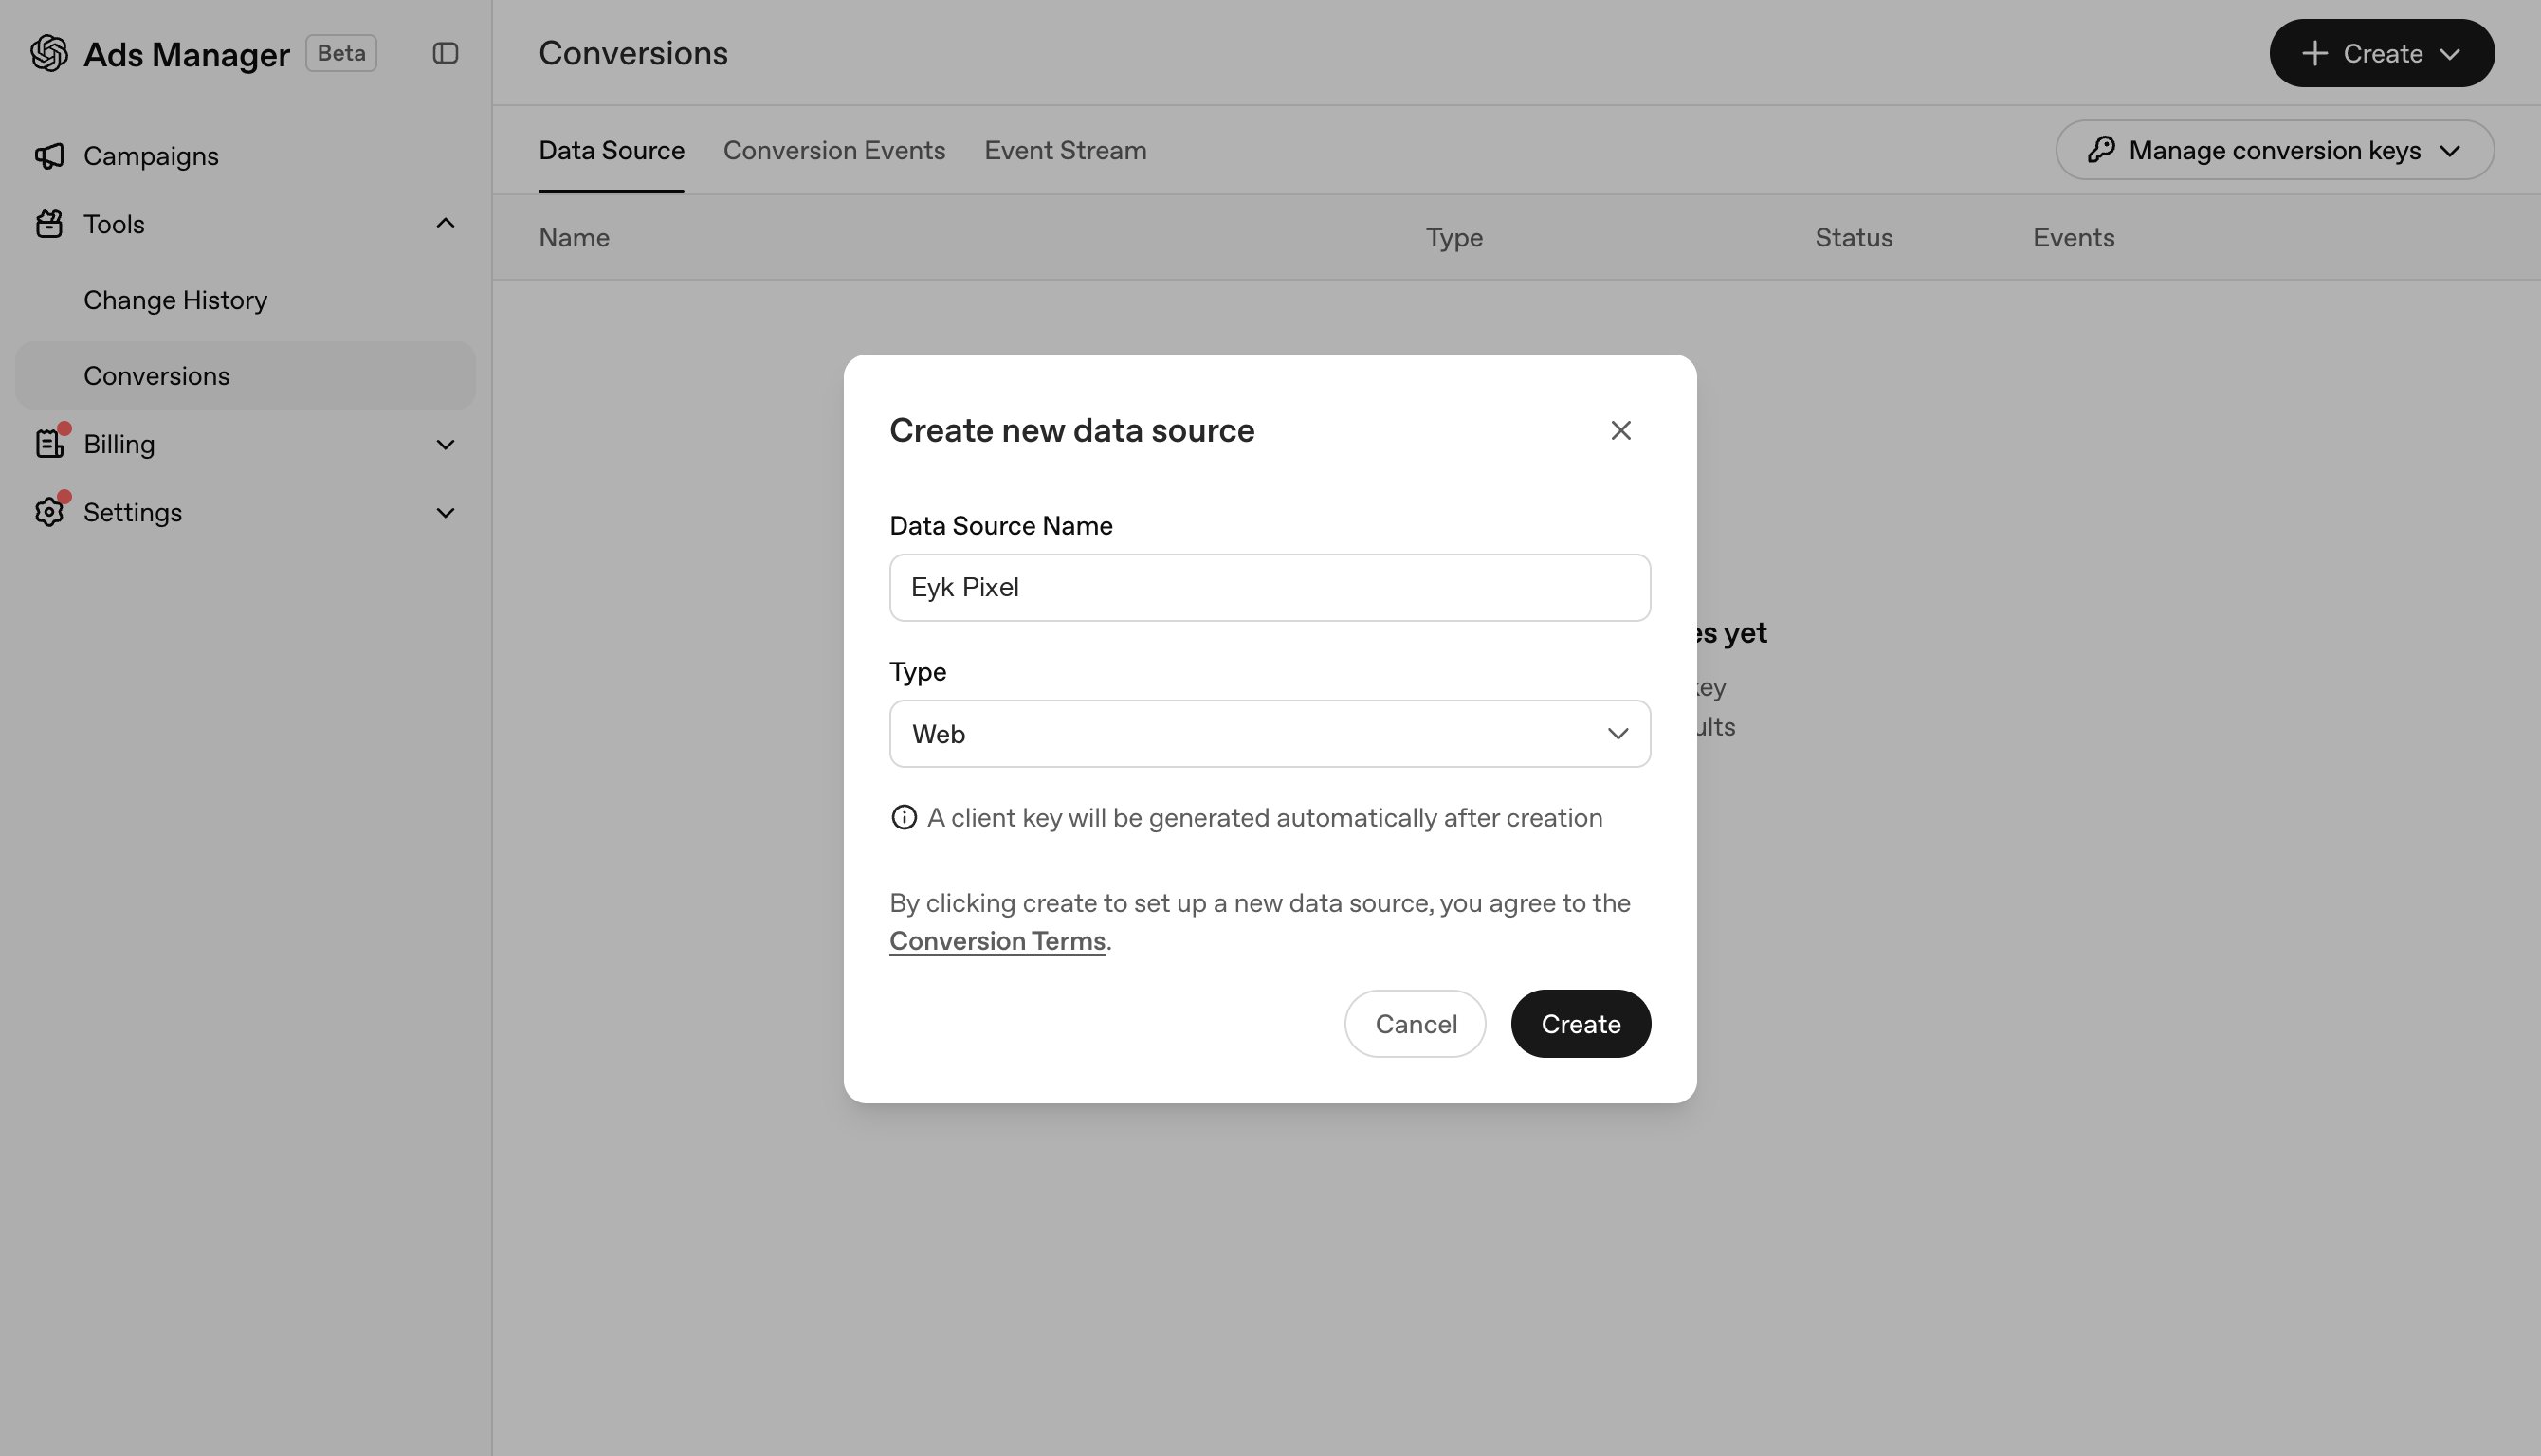 The **Copy data source** screen opens. Copy the **ID** at the top — you'll need this in Eyk. Ignore the setup code and click **Confirm**.
You don't need to install the setup code on your website. Eyk's tracking sends the events for you.
The **Copy data source** screen opens. Copy the **ID** at the top — you'll need this in Eyk. Ignore the setup code and click **Confirm**.
You don't need to install the setup code on your website. Eyk's tracking sends the events for you.
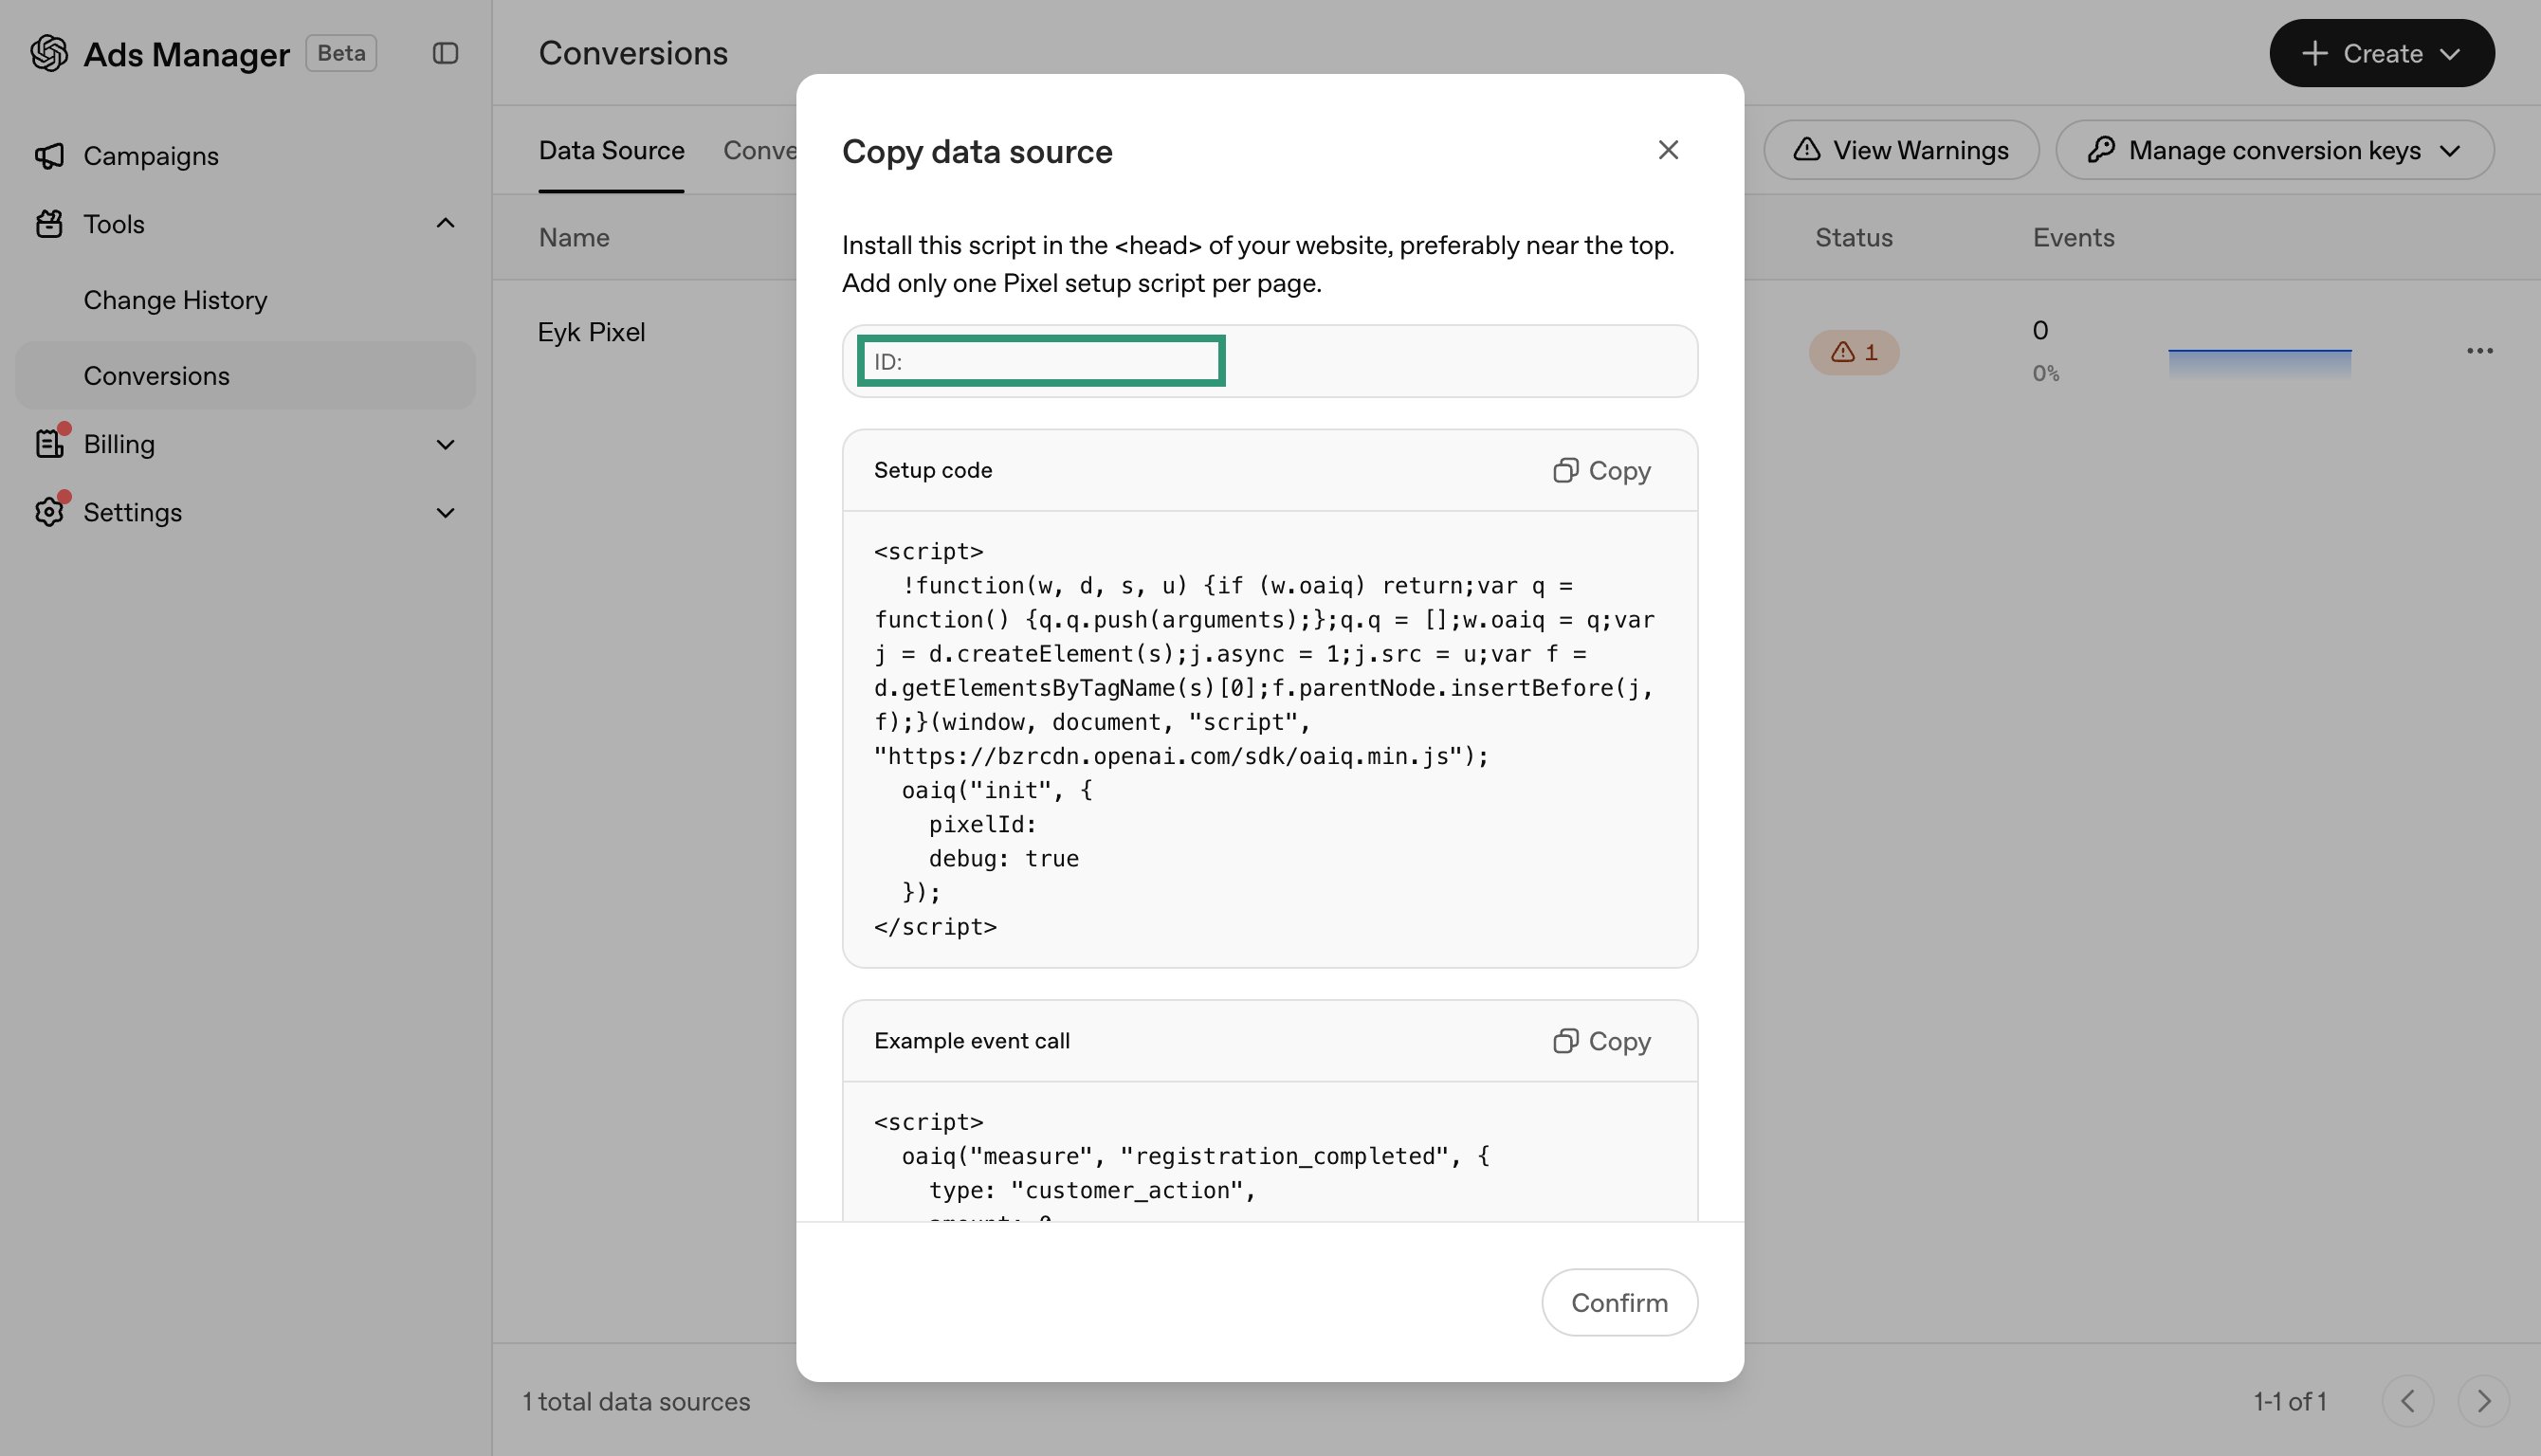 Back on the **Conversions** page, click **Manage conversion keys** and select **+ Create new key**.
 For **Name** enter `Eyk` and click **Create**.
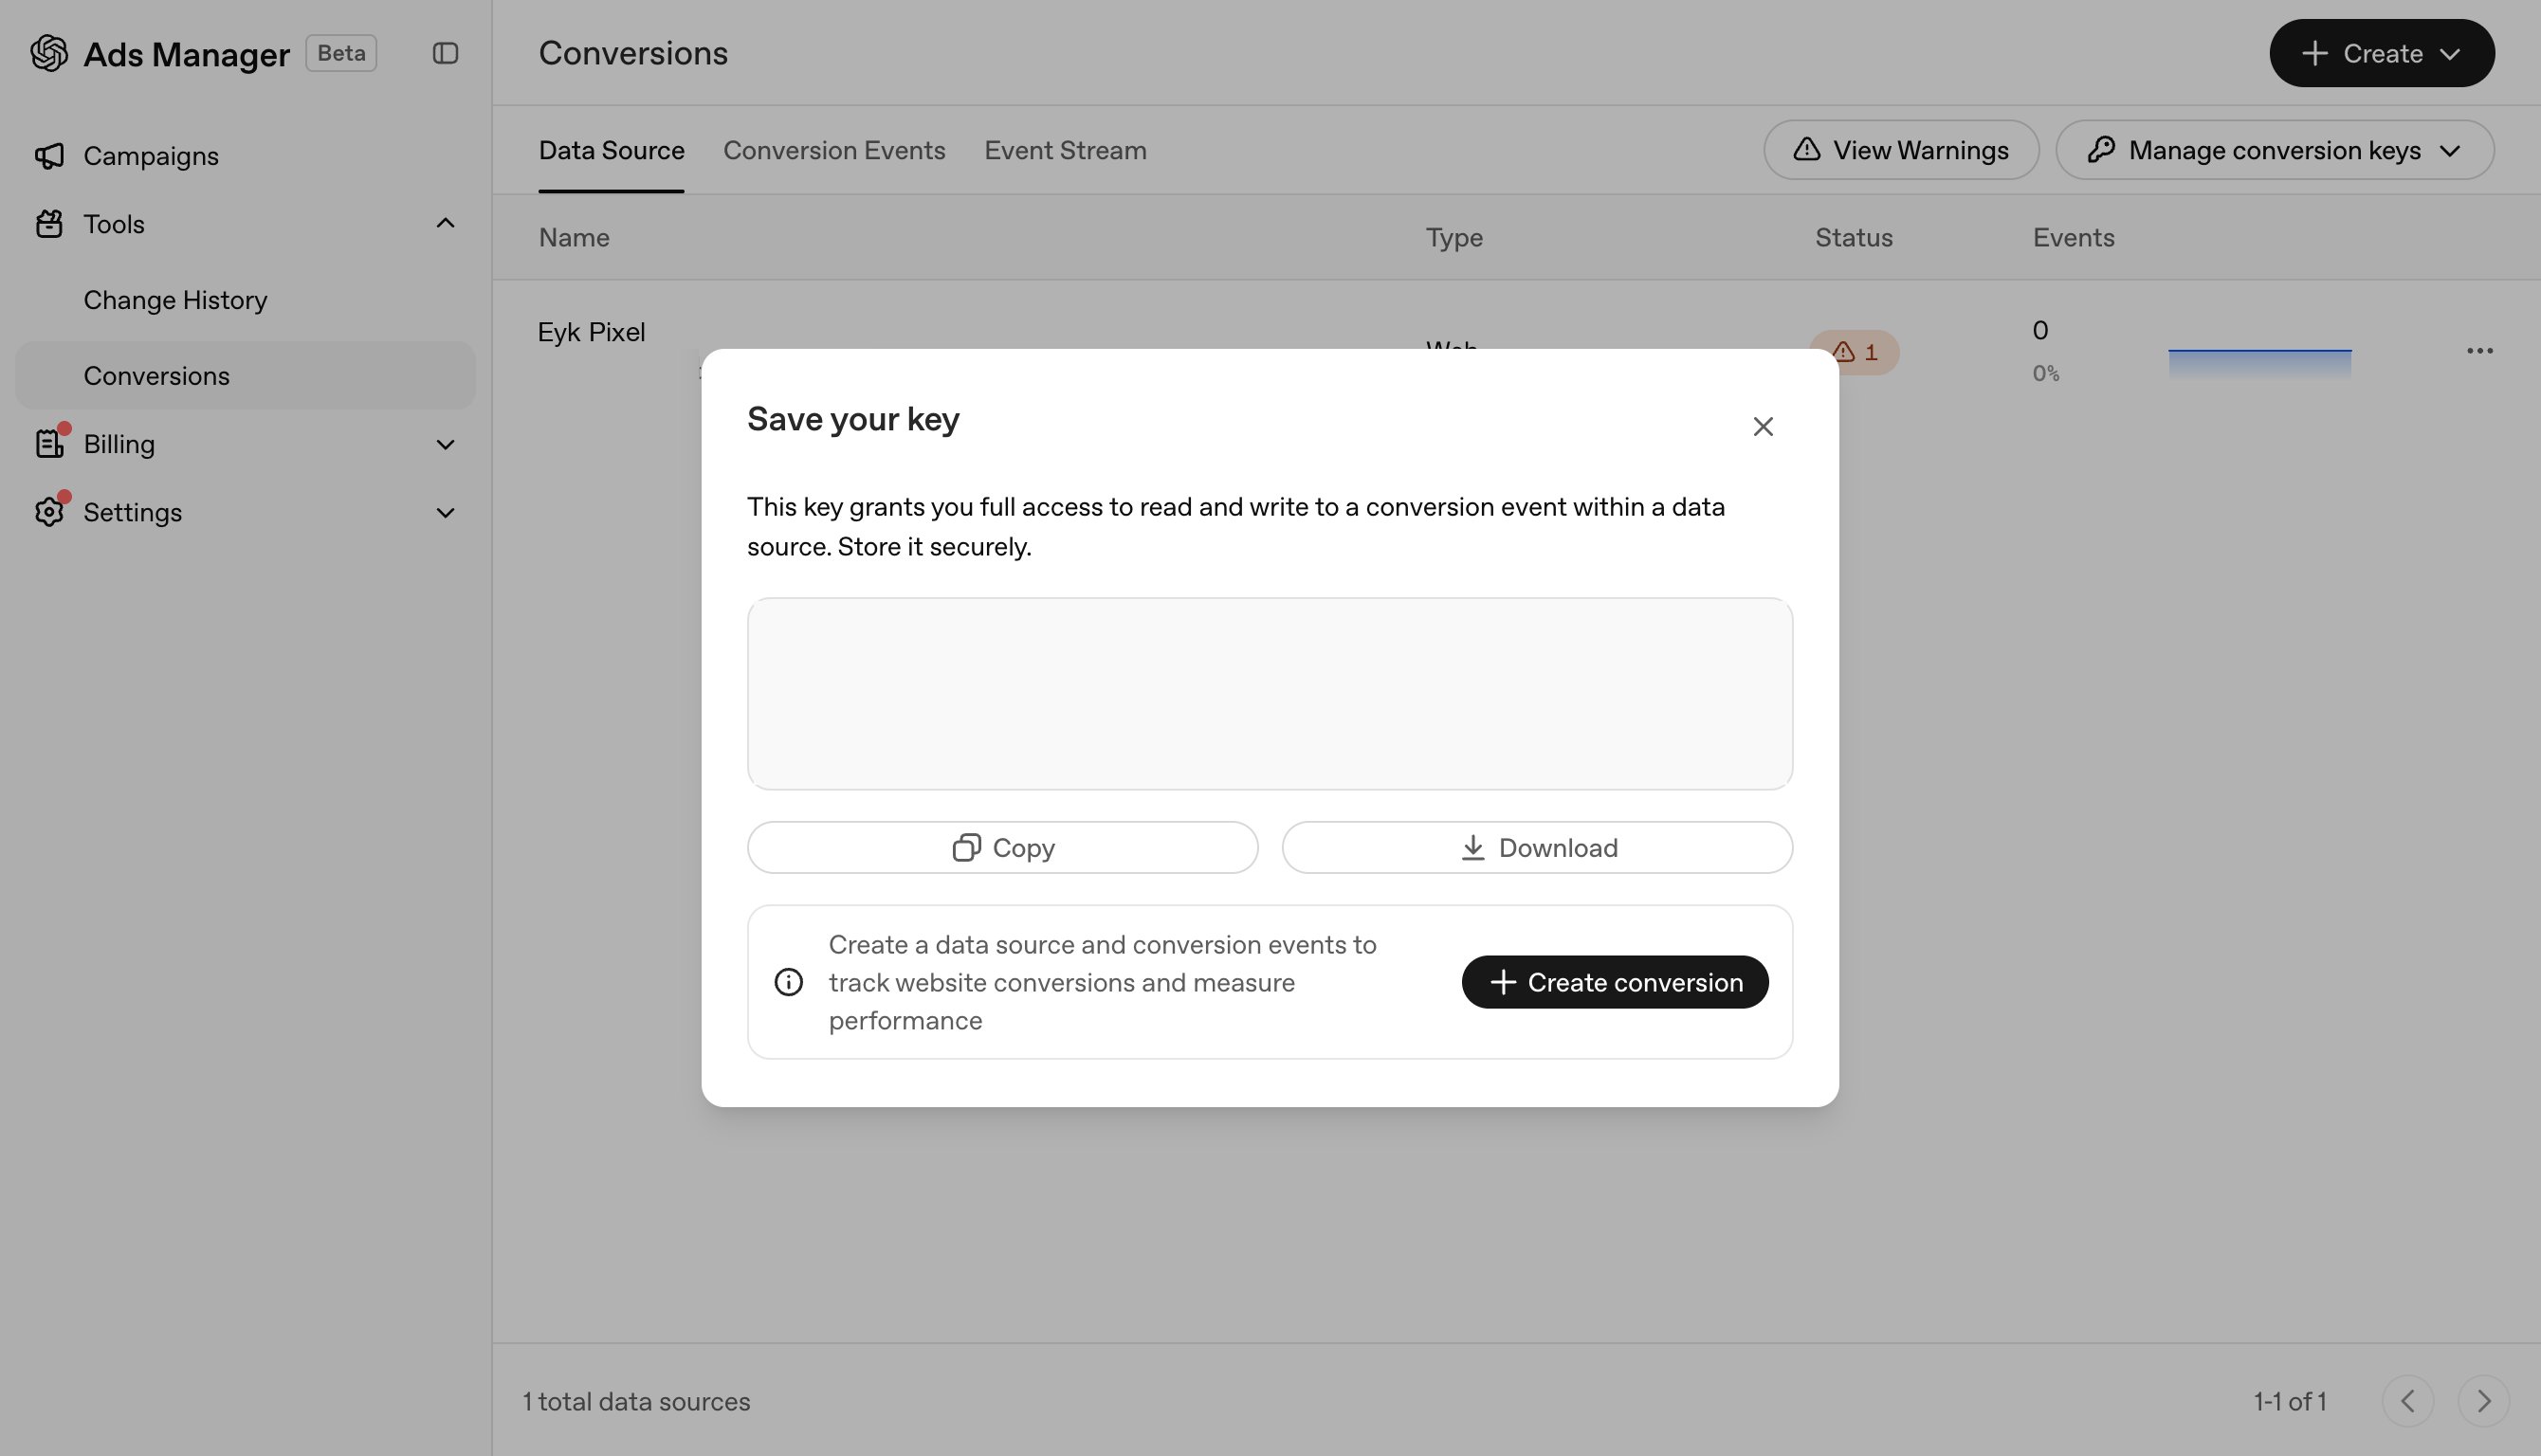
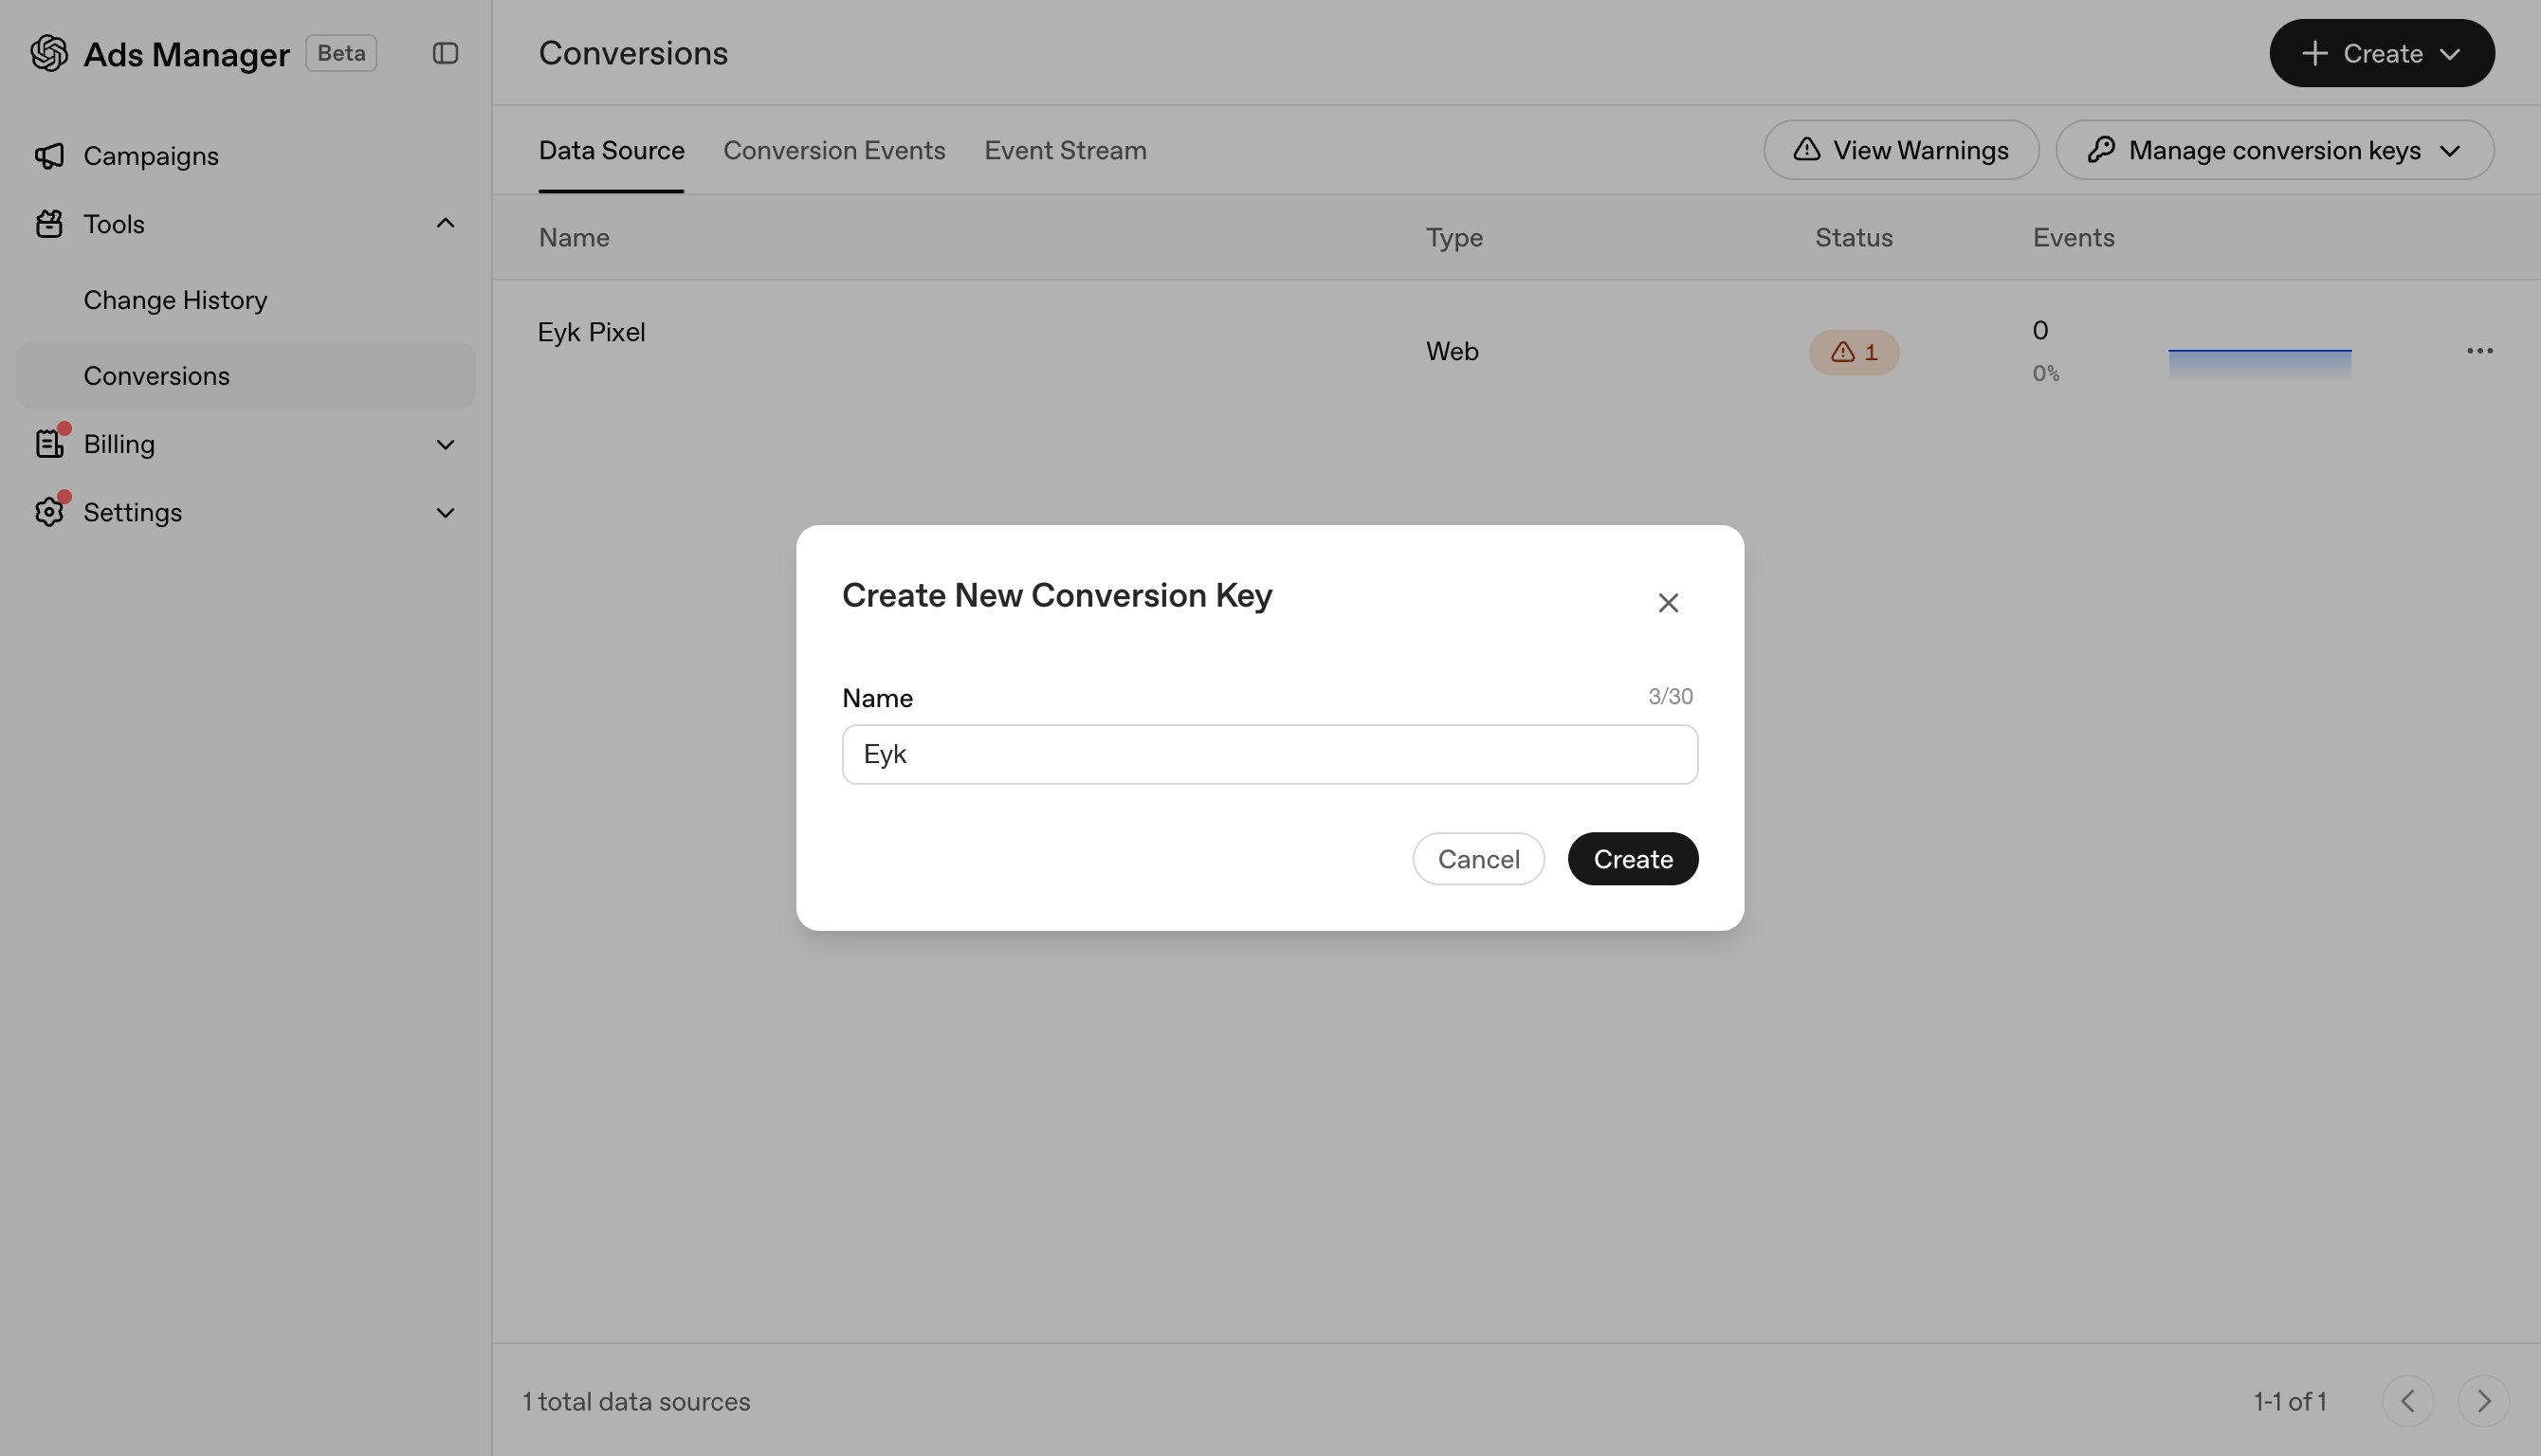 On the **Save your key** screen, click **Copy** and store the key somewhere safe — you'll need it in Eyk.
OpenAI shows this key only once. If you lose it, create a new key.
On the **Save your key** screen, click **Copy** and store the key somewhere safe — you'll need it in Eyk.
OpenAI shows this key only once. If you lose it, create a new key.
 ## Part 2: Add the destination in Eyk
In your Eyk environment, go to **Tracking** and click the **+ Add destination** button.
Select **OpenAI Ads** from the list of destinations.
Enter the **Data source ID** from step 4 and the **Conversion API key** from step 7, then click **Start verification**.
All done! ✅
Once you publish this destination, you should pause or remove all existing OpenAI Ads tracking. Leaving these on will lead to duplicate tracking.
## Check that events arrive
In OpenAI Ads Manager, go to **Tools** >> **Conversions** and open the **Event Stream** tab. Events from Eyk appear here shortly after visitors trigger them on your website.
## Part 2: Add the destination in Eyk
In your Eyk environment, go to **Tracking** and click the **+ Add destination** button.
Select **OpenAI Ads** from the list of destinations.
Enter the **Data source ID** from step 4 and the **Conversion API key** from step 7, then click **Start verification**.
All done! ✅
Once you publish this destination, you should pause or remove all existing OpenAI Ads tracking. Leaving these on will lead to duplicate tracking.
## Check that events arrive
In OpenAI Ads Manager, go to **Tools** >> **Conversions** and open the **Event Stream** tab. Events from Eyk appear here shortly after visitors trigger them on your website.